Since my next little one’s birthday is coming up all too quickly (the big 1 year!) I figured I better blog about Kristopher’s birthday cake now or it’ll be too late :)
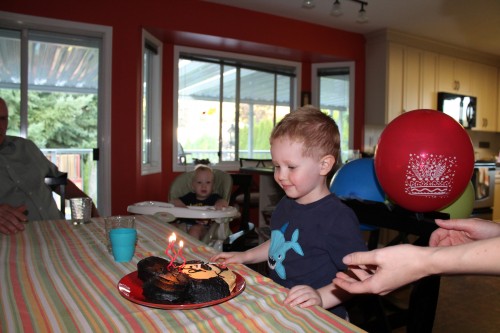
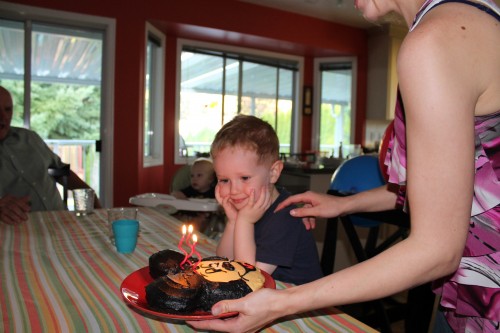
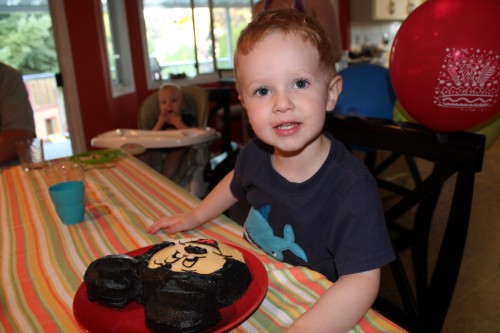
This little man turned 3 a few weeks ago, and chose a Mickey Mouse cake for his special dessert.
This little boy is the sweetest thing, with the most ridiculous, loud, and entertaining cartoon-character voice. I figure when he hits his teens and his voice cracks we won’t even notice, because his inflection is so naturally dramatic. I’m pretty sure he’s on his way to being the shy, considerate, introverted kid who shocks everyone by rocking the school play as the lead role, because when he turns it on he is ALL performer.
He loves to sing, dance, and act, and puts all those dramatic skills to use both for better and for worse, keeping us on our toes. He is incredibly smart (if I do say so myself ;)), and I honestly can’t believe he has to wait two more years before he goes to school. Everything from the alphabet to counting to 100 to all the planets in the solar system and which animals are extinct, he is fascinated and overflowing with questions to make sure he’s got it right.
I thought I should start teaching him how to spell his name so by the time he could write letters he’d know which ones he needed, because Kristopher is a LONG name, and so far we haven’t really shortened it, both by his choice and ours. I started out with a kind of lilting cheerleader song: “KR! IS! TO! PH! ER! Krrrrrissssstopher!!” and he mastered it in a day. A couple weeks later Carl jokingly asked if he knew how to spell his name.
With a quiet deadpan face and voice, he rattled off: “K-r-i-s-t-o-p-h-e-r. That’s how you spell it, Dad.”
HA! You should’ve seen the look on Carl’s face, and we all burst out laughing. Me: See Carl, I do teach them things sometimes! You do me proud, son.
As Gemma is starting to sound out words, he is right beside her sounding out the letters, and follows me around all day while she’s at school asking, “NOW what should I spell, Mom?” as he sounds out simple words. Of course, one of his favourites, for anyone who’s watched the show, is the ever-catchy M-I-C-K-E-Y M-O-U-S-E. It’s the Mickey Mouse Clubhouse! Come inside, it’s fun inside…
Even more fun when you realize how totally easy this cake is to make! You don’t need any special pans or special icing tools, just some gel food colouring and some Ziploc bags and you are on your way to one happy birthday :)
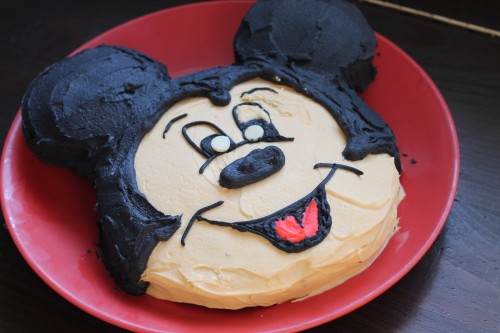
Now obviously, we aren’t working with fondant, so there will be some imperfections, but it certainly doesn’t need to be as imperfect as mine – see that right eye?
Oooh, it bugs me, that eye.
It wasn’t quiiiite perfect, so I fiddled. And I faddled. And I should have done neither, because it was better before. But really, when the cake is for a 3-year-old who thinks his sister’s marker drawings of Mickey are the bees knees, you should leave well enough alone because he’s going to LOVE it anyway.
Honestly, he was excited when he saw the cake on the plate before it had even seen any icing. I could’ve stopped there. But if you want a super easy way to impress the Mickey lover in your life, this is how to do it with minimal stress.
Bake a cake (I used a chocolate cake mix) in one greased 8″ or 9″ pan and 6 greased jumbo muffin tins. Let cool completely, then cut the round cake down to a size that is more proportionate to the ears. I cut off about 1/6 of the cake, I would guess. Make a big batch of the best ever buttercream icing. Divide the icing into 3 bowls (you only need a tiny bowl for red), and dye them black, red, and peach (I mixed yellow with a hint of red for this). Ice the whole round cake with peach first. Let set, then proceed with black. For perfect edges, put some of your icing in a Ziploc bag, cut a small corner off, and pipe icing out that corner in the pattern you want. Use this technique for all the “detail” work of the eyes, nose, and mouth. Put the red icing in a bag, cut the corner, and fill in the tongue carefully. Press white chocolate chips in upside down for the eyes, aaand you’re done! Told ya it was easy :)
Here’s a video tutorial for a slightly fancier version that got me inspired – love the background music :)
- 1 box cake mix (or your favourite homemade recipe)
- Water, oil, and eggs, as called for on the box
- Icing sugar
- Butter
- Milk
- Black food gel
- Red food gel
- Peach food gel (or mix yellow with a touch of red)
- Divide cake batter between one greased 8" or 9" pan and 6 greased jumbo muffin tins. Let cool completely, then cut the round cake down to a size that is more proportionate to the ears. I cut off about ⅙ of the cake, I would guess. Make a big batch of the best ever buttercream icing (link in post).
- Divide the icing into 3 bowls (you only need a tiny bowl for red), and dye them black, red, and peach (I mixed yellow with a hint of red for this). Ice the whole round cake with peach first.
- Let set, then proceed with black. For perfect edges, put some of your icing in a Ziploc bag, cut a small corner off, and pipe icing out that corner to form the edge you want. Use this technique for all the "detail" work of the eyes, nose, and mouth. Put the red icing in a bag, cut the corner, and fill in the tongue carefully. Press white chocolate chips in upside down for the eyes.






What a cutie. Great job on the cake.
I am going to send you the healthy cake recipe now.
VERY cute!!! I LOVE his expression on his face on the first picture…. !!! AND to be able to spell his name!!! WOW!!!
Such a smartie! Kristopher is a long name to learn! And such a talented mommy! :) Sorry we weren’t there to share the birthday but, I must admit, the black icing would not have tempted me ;)
It definitely made our teeth a horrible colour, and you could see evidence of it the next day too :) The kids thought both effects were pretty cool :P